
In-Store Booking
Please consult the following page for more information to create a new booking.
Booking setup
Once you clicked on the In-Store (DOOH) booking type, a series of forms to enter the booking details will be presented. The first form is the Booking setup:
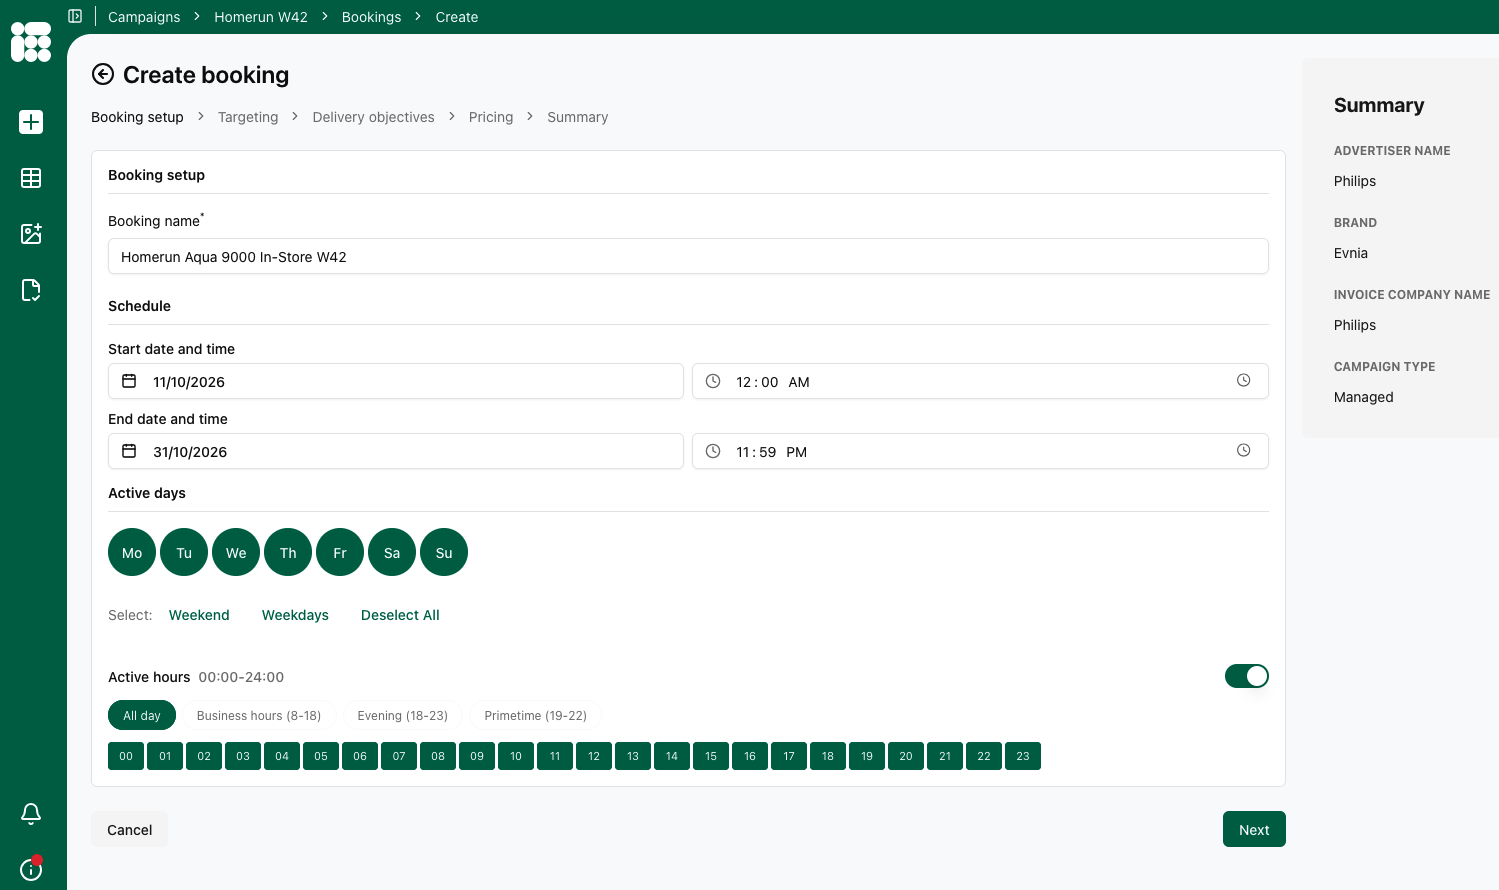
In this form, the following details need to be entered:
- Booking name
- Schedule: Start date and End date of the booking including starting hour and ending hour. By default the the date of today is chosen for the start date and the beginning and end of the day are chosen for the beginning and ending hours of the booking.
- Active days: Days the booking will be displayed, with quick selects available for the weekend and weekdays.
- Active hours: Togglable setting which shows the hours during which the booking will be active, with quick selects available for Business hours, Evening, and Primetime.
A bookings end date also determines priority. Bookings that will end earlier, but have the same priority setting as other bookings that will end later will receive a higher priority and a higher share. For more information see this page.
Once you're done filling in the details of this screen, you can click Next to proceed to the next form.
Targeting
In this form the Booking's placements and targets will be filled in.
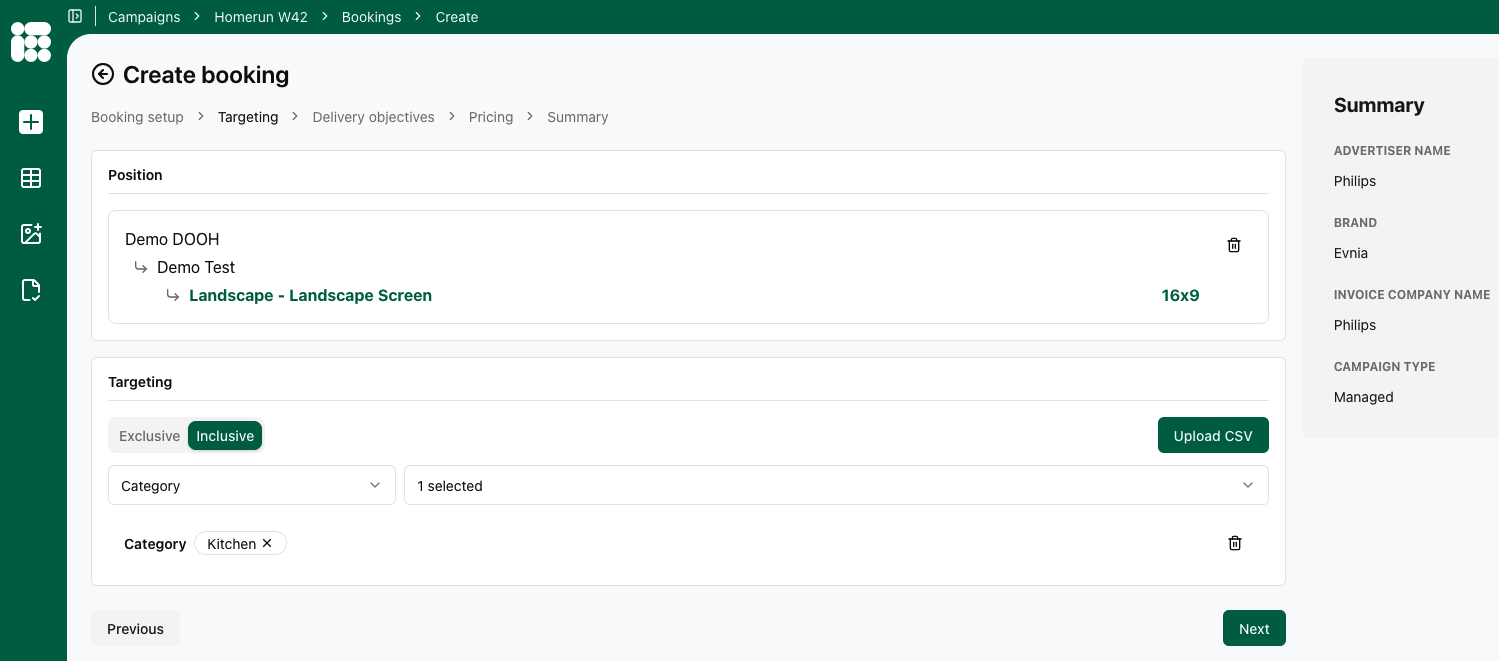
the following details need to be entered:
- Position: Either a channel or a single position. The Channel is organised by Location -> Position -> Format; the Position is organised by Publication -> Location -> Format
- Exclusions: Here you can exclude certain publications and positions from channels
- Targeting: You can select inclusive or exclusive targets. Inclusive targets will display the booking if the target is present in the request, while exclusive targets will display the booking if the selected target is not present in the request.
- Target category: category of targets you want to add. Targets within the same category work in an OR relationship (adding more targets widens the inventory), while an AND relationship exists between target categories (narrowing the inventory).
- Target value: Once you selected a target category, you can add target values. There is a search bar available to aid in finding the right targets.
Be cautious when combining positive and negative target values within the same target type. A positive target value in the same target type as a negative target value can cancel out the negative target. If the positive target is present, the booking will be delivered (since it's in an OR relation, only one target needs to be present), even if the target that needs to be excluded is present. You can solve this by making a combined target value. For more information, see the Targeting page.
Targets make a booking more specific and, therefore, count towards its priority, IF the inventory is not sufficient for all running bookings (overdelivery). A booking with targets active will take priority over a booking without in this case, provided the actual priority level is equal.
Once the position and targets are selected, we can proceed to the following form by clicking Next.
Delivery objectives
In the delivery objectives form, you'll fill in the to reach objectives of your booking.
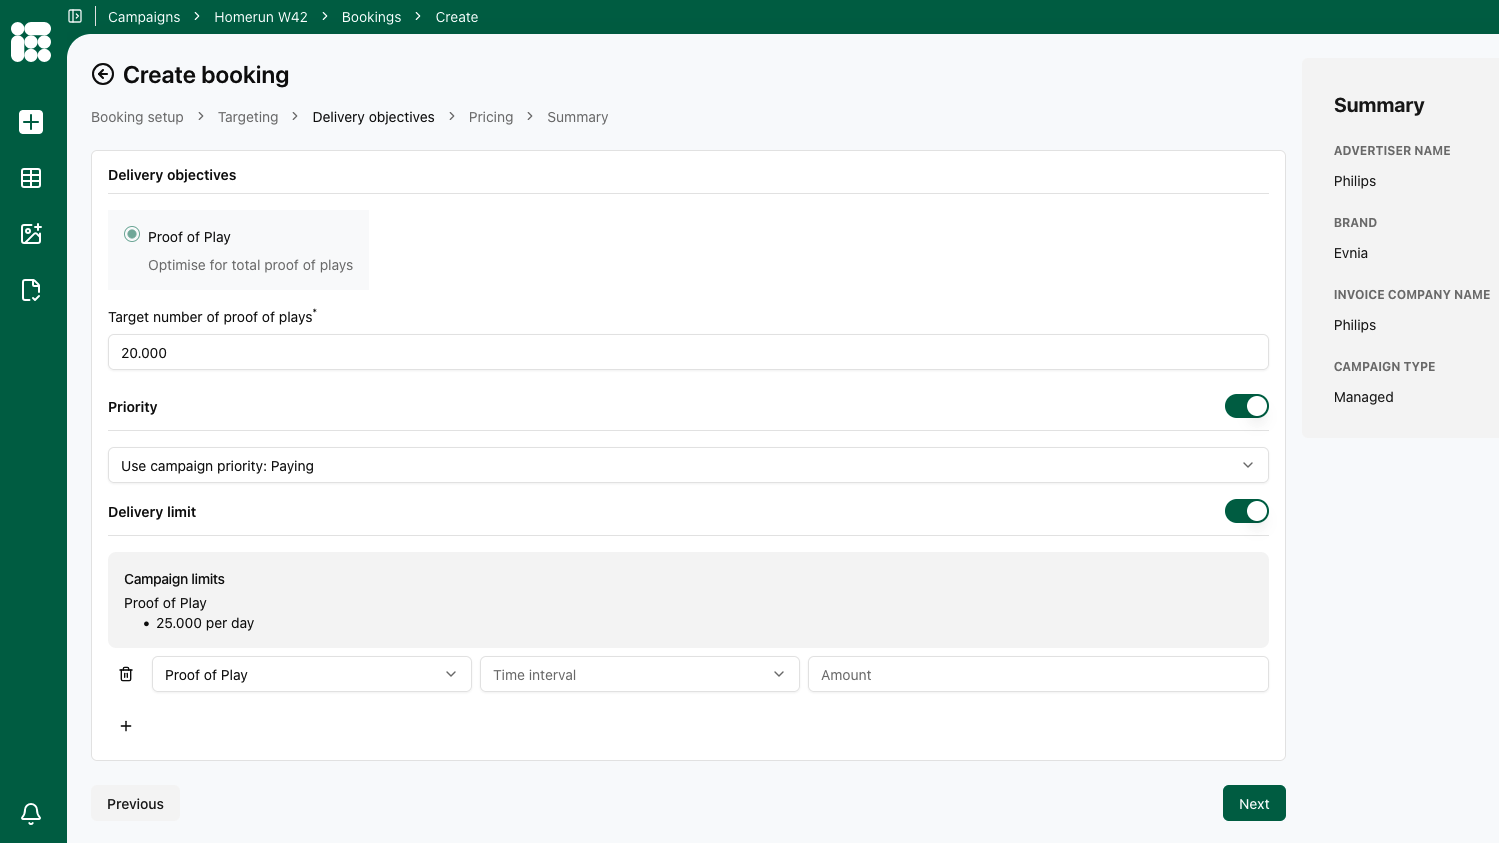
the following details can be entered:
- Target number proof of plays:
- Target number of proof of plays: Enter the to reach amount of the booking objective. Delivery of the booking will stop once the objective is reached.
- Priority: This togglable setting allows you to set a priority on booking level. By default the booking inherits the campaign priority. If you set a priority on booking level, it overrides the campaign priority for this specific booking.
- Delivery limit: This togglable setting works just as the campaign delivery limit. Here it's a limit solely based on proof of plays, either Daily or Hourly expressed in the chosen amount. For the chosen time period, when the target is reached, the bookings will stop delivery for the duration.
When all details of the form are filled in as needed, click Next to proceed to Pricing.
Pricing
Here we select the pricing model for our booking.
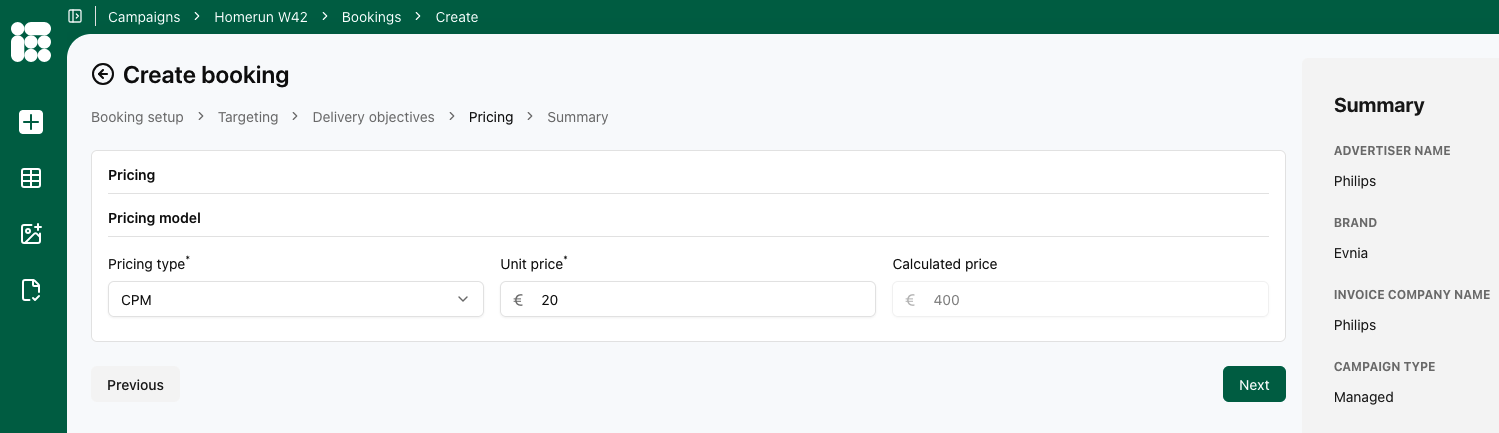
Here we select the pricing model for our booking.
- Pricing model: this option is togglable, the pricing model is entirely optional.
- Pricing type: Depending on the setup of your account, the following options are available:
- CPM or cost per mille, the cost per thousand impressions for an ad.
- CPP or cost per period is the cost for a fixed delivery period, independent of the number of impressions or clicks.
- ADM or administrative cost, a cost that is unrelated to a volume or time.
- Pricing type: Depending on the setup of your account, the following options are available:
Once the pricing details are filled in as required, you can click Next to head to the summary.
Summary
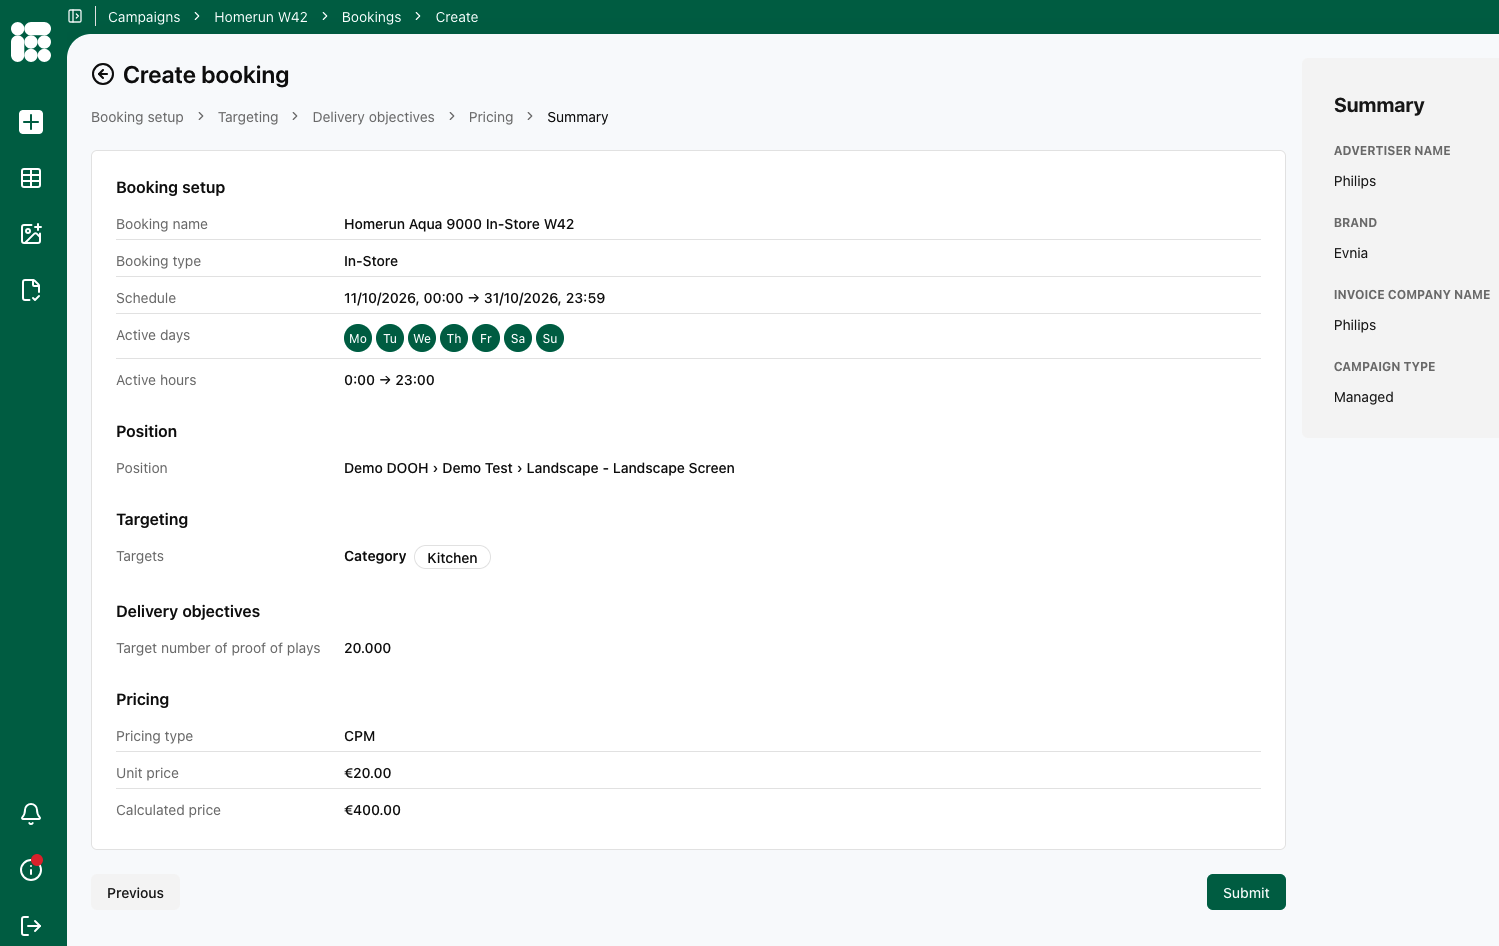
On the final screen of the in-store booking creation process, we get a summary of all the booking details we filled in. After checking if the details are filled in correctly, you click on Save booking to complete the process.
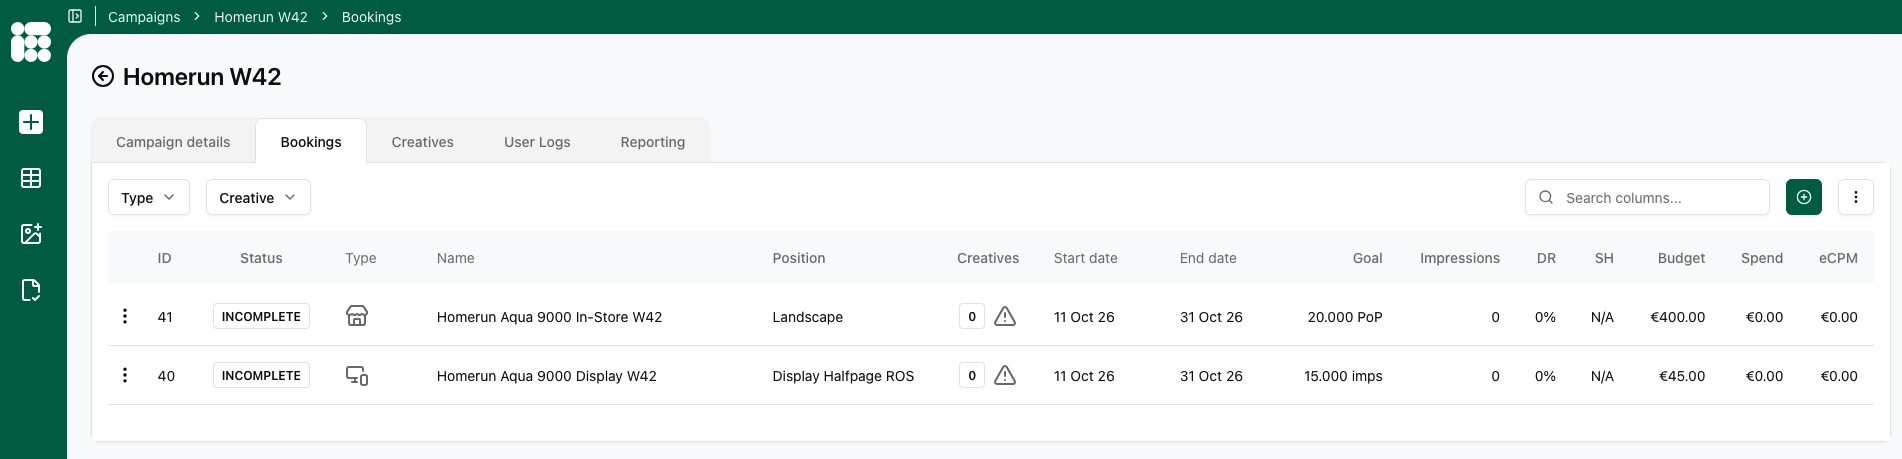
After saving you'll land on the booking overview.
No comments to display
No comments to display